CTC Studio

Play with light, You might like it, You never know...

Assignment: Black and White Results

Published by makka under on 4:50 AM
Hi All,

Here goes Assignment :Black and White Results

Flickr Pro Account Winner is:
http://www.flickr.com/photos/chris1804/2589872460

[Note : not able to publish the photo here.The flickr link is totally restricted !!! @Rare Breeze you have to do something about this]

A Good natural black and white Try!!!

A comment f for the photo in flickr:
What a wonderful view. I can imagine how you felt looking it personally. My photography is taking second place for this view than the pleasant enjoyment.


Other Photos,that catch our eyes in this competition :("ctcStudio picks" we can say)

1.Glow-Bali


2.Sethu-sankar

Black and White

3.Karthickz
இந்தப் புன்னகை அவளுக்கு சொந்தம், அவள் யாருக்கோ...

4.Raghu


5.John


Note : I Note able to publish some 3 more pics here due to Image copy/Link restrictions in flickr.


See You aGain.

Cheers,
Bhagath makka
http://www.flickr.com/bhagathk

Pic-O-Week _ August First

Published by makka under on 3:48 AM
After one month ...I am back ;-)

Here goes the Pic-O-Week .

Photographer  : Diwakar
Place              : <unknown> (may that's not so important for this pic)
Home Page     :  http://www.flickr.com/photos/bay_range

beee

Personally ...I fella pleasant deel from these colour combination.


Cheers,
Bhagath makka
http;//www.flickr.com/bhagathk

The Almanac - Concept - Street Photography

Published by Hari Kumar Balasundaram under , , , , , on 1:18 AM
"When I saw the photograph of Munkacsi of the black kids running in a wave I couldn't believe such a thing could be caught with the camera. I said damn it, I took my camera and went out into the street." Henri Cartier-Bresson
------------------------------------------------------------------------------------------------
Following our first steps into the foray of street photography through a photo walk session in the city of chennai - here's a precursor to what photography in the streets is all about - Read on !!!

Street photography is an approach to photography rather than a location, although the streets are the usual place it happens.

Street photography captures candid mood and situation and it is generally practiced at public places streets, parks, sea-beaches, malls and political and social gatherings. It is pretty easy to take photographs at these places without seeking any permission.

A street photographer can also take the pictures of historical buildings and archaeological monuments.

Street photography can be and often is: Odd things in the fore ground; no central focus; odd crops.It is sometimes referred to as no rules photography.

The plethora of equipment (tripods, lenses, filters, lights etc etc) associated with "serious" photography is left at home, or better still in the camera store. Its just too heavy and bulky to cart around, takes way too long to set up and by the time it is set up the moment is gone.

Street photographers see the usual, the every day with fresh eyes. The reflection in a rain puddle, the colours in a crowd, the balance of a negative space. Their minds are open to all the stimuli that they see and they curse the days when they leave their camera at home.

Street photographers are optimists, for them the glass is always half full. They go out on a photo shoot with no plan in mind secure in the knowledge that this wide world of ours will provide. A subject, a situation, a scene will present itself all they have to have is the presence of mind to capture it when it does.

Street photography is, what all photography is, a snap shot. What shines through is the photographer, his/her interpretation of the scene, what they see in the situation, their reaction to the stimuli, the art they see in their every day walk of life.

Technicians take technically correct and often pretty pictures. Visual artists, whatever their medium, create images that stimulate the mind, the heart and validate the human condition in all its guises. Because, after all, pretty is in the eye of the beholder and consequently very subjective, whereas art speaks to all who are prepared to listen.

content reference : excerpts from bateman's blog & other digital camera resources

Hari Kumar Balasundaram

Before and After - Potrait - Brightness and Contrast

Published by தம்பி... under on 1:21 PM
Before:
Before - Potrait


After:
Patience and Hard Work


Steps:
1. Crop the photo. Here its little tight and given some breath space where the subject is looking into.
2. Adjust the Brightness and Contrast
3. Slightly adjust the saturation and the vibrancy for the mood.
4. Add a border to the canvas, which will give the picture complete.

The Almanac Special - Profile of a Photographer - Reza Deghati

Published by Hari Kumar Balasundaram under , , , , , , , , on 3:33 AM


Our endeavour to present to you - the best of the world of photography continues with a special showcase of one of the most renowned award winning photo journalist of our times - a living legend whose work on and off the camera has helped millions today in the war torn regions from Afghanistan & Europe through Africa.


Reza Deghati (Persian: رضا, born 1952 in Tabriz, Iran ), studied Architecture in the University of Tehran, Reza today is a french citizen , highly regarded and published worldwide by the most prestigious international magazines.

Reza Deghati was a victim and survivor of both the Shah and the Iranian revolution. Since then he has continued to seek out, connect with and document peoples in similar circumstances throughout the world.

Reza returned back to Iran and Afghanistan to help the victims of the bloody war waged between the soviets and later with the taliban. In 1985, Reza Deghati challenged Afghan warlord Ahmad Shah Massoud to a game of chess, and started a friendship that has lasted more than 15 years. "He plays chess like he fights the Taliban," the Iranian-born photographer says, "trying to psychologically defeat you."

National Geographic television has produced several films portraying Reza and his photographic and humanitarian work. One has received an Emmy Academy Award in 2002.

In 1991, Reza and his brother Manoocher founded Webistan Photo Agency[2], which has been distributing their own archives but also those of several other photographers.

Having been a consultant to the United Nations in Afghanistan in 1990, being culturally close to this country and particularly being a journalist led Reza to found AINA[3]. The NGO Aina, that is based in Paris, Kabul and Washington D.C., struggles for developing a civil society and cultural expression by empowering media and communication.

In November 2005 Reza was honoured with the title of "Chevalier de l’Ordre du Mérite", the French award for distinguished services in a public or private capacity, by the President of France, Mr. Jacques Chirac.

He also was awarded the prestigious “Missouri Honor Medal for Distinguished Services in Journalism” from the Missouri School of Journalism [4], in September 2006, in "recognition of his lifelong contributions, through brilliant photojournalism, to justice and dignity for the world’s citizens".


Commemorating the blogpost of my master crafter & Hero, Some of Reza's greatest pics are on display at my facebook page : http://www.facebook.com/album.php?aid=87077&id=556512363


You could also read more about Reza's Deghati's works from the following websites :

http://photography.nationalgeographic.com/photography/photographers/photographer-reza.html

http://www.webistan.com/bio-reza.htm

http://www.flickr.com/photos/unama/sets/72157618704545386/

http://www.facebook.com/pages/Reza-Deghati/131514225710?v=info


References : wikipedia, webistan, wapedia

Hari Kumar Balasundaram

The Almanac - Page 2 - Metering & Exposure

Published by Hari Kumar Balasundaram under , , , , , , on 5:16 AM
"I'll just fix it later in Photoshop." - If this is your most used phrase while taking pics – think again!!! Photography is not always about editing and post processing alone – Softwares such as Photoshop have become a very bad prop for good unblemished photography so to speak. You can never completely save an over or under exposed pic using an image manipulation software.

A perfect exposure is the Holy Grail of every photographer. Although, there is no one right way to accomplish perfect exposure, obtaining the right amount of exposure depends on four factors –

• Factor 1: Amount of light incident on the subject
• Factor 2: Amount of light reflected from subject into camera lens
• Factor 3: Amount of light passing through the lens onto the film
• Factor 4: Sensitivity of the film/sensor being exposed (ISO)

Factor 1: is controlled by the intensity of the light source – mostly the Sun on a broad daylight for instance and whether anything is blocking this light – trees, buildings & clouds for example. The position of the Sun at various times of the day vis-a-vis the subject’s position, whether the subject is lit from the front or the back or some of the subject may be in a shadow.

Factor 2: is simply controlled by the reflecting nature of the subject – snow or white coloured clothing for example reflects more light towards the camera than a dark subject such as coal or black stone for example.

Factor 3: is purely controlled by the camera settings – a slower shutter speed or a larger aperture allows more light to fall on the film / sensors

Factor 4: in simple terms is the ISO of the film / sensor.

Whilst taking a look at the four factors – we can easily ascertain that the photographer can control only factors 3 & 4. To simplify – Using an ISO of 100 - let’s say for a broad daylight – the photographer will have to set the shutter speed and the aperture to balance out the effects of factors 1 & 2. How can you best measure the factors 1 & 2 to set the shutter speed & aperture.

The simplest and the easiest way to understand this is to use the automatic settings in your camera – the camera’s inbuilt light meter measures the light incident on the subject [ factor 1] and the amount of light reflecting from the subject [ factor 2] and sets the shutter speed and aperture accordingly.

But here comes the trick question – how can the camera possibly know that the subject its shooting is either snow or a person clad in white clothing or dark clouds in the horizon. To choose the camera’s settings – the light meter in the camera has to make an assumption that the subject is neither too dark nor too bright and that the subject reflects a medium level of light – 18 % reflectance – the midpoint between white n black in the luminance values.

“What the hell” is exactly the thought that would have propped in your mind right now and I know this sounds too techie – but let me explain a bit ..
-----------------------------------------------------------------------------------------------------------------
What you see there is a nice scene of some fishing boats, with a good tonal range, plenty of colour and some nice late-evening sunlight.


What your camera’s light meter sees is this:

Try this tutorial for yourself: copy the fishing boat scene onto your hard drive. Start up your image editing software and open both pictures. Light meters only see in black and white, so reduce the saturation of the fishing boat shot to zero. Next, add a Gaussian blur set at its maximum level, so that the whole picture is reduced to a field of grey. Use the eyedropper tool to measure the RGB colour value of the resulting tone. You should find that it is a mid-tone grey with an RGB value of around 127,127,127.

It’s an interesting and curious fact that any average scene reflects 18 per cent of the light falling on it. Look out of your window, and unless you live in the Arctic or the Antarctica the scene you see is reflecting exactly the same amount of light as the scene out of my window. That 18 per cent reflection is exactly the same as a mid-tone grey, mid-way between black and white.

Light meters are calibrated with this fact in mind. When your camera takes a light reading, the meter averages the scene and adjusts the exposure to produce that mid-tone grey (or 12 per cent luminance, but that’s another discussion altogether). If you point the camera at a black stage curtain, it will try to make the black into a mid-tone grey, so it will over-expose. If you point it at snow it will try to make the white into grey, so it will under-expose.
-----------------------------------------------------------------------------------------------------------------

Therefore - Our camera’s light meter whilst shooting a snow covered mountain – would simply adjust to have a medium level of light present as detailed above and therefore snow would appear grey and not snow-white realistically speaking.

Now what if the camera were to focus on the volcano – the rocks would simply be too dark and the camera’s light meter would also adjust here for 18% light and shall render the volcano also as grey and not black as the case may be ..

What if the Sun whose light is reflected by the snow and the volcano is suddenly covered by clouds – although the sun’s intensity has not reduced – the incident light does not reach the snow or the volcano and therefore the reflectance has changed.

In each of these cases – the camera’s exposure setting either is over or underexposed

Now - Imagine if you were to focus the grass incident on the ground with the volcano, the camera would return medium light values as the grass is devoid of such high reflectance as snow or volcano and therefore offers a perfect exposure setting for the shot.

The above setting offers a clue to obtaining a correct exposure – i.e. Under a given lighting condition, meter off a subject of medium brightness to select shutter speed and aperture and then use these same settings to photograph subjects of different reflectivity.

For eg. At a given ISO of 100, if the automatic settings of the camera were to return values of shutter speed of 1/125 at F 22 . But to make the snow whiter – we need to choose either F11, F8 or F5.6 but which one .. By metering on the grass below – the camera now adjusts for the right medium values as F11 at 1/125 secs. By shooting now at F11, we are now telling the camera that it needs more light to shoot a snow covered volcano for a perfect shot i.e ...

Similarly for the volcano – the camera might select F5.6 at 1/125 sec for a grey toned volcano and to make this dark – we would need to reduce the exposure of the sensor. This can easily be done by metering off the grass which would return values of F11 at 1/125 of a sec. If we were to shoot the volcano now – the colour of the volcano would return dark and this would be a perfect exposure.

We have just discovered that be it shooting the snow or the volcano – the correct exposure is F11 at 1/125 of a sec.

With this understanding – do you really think that the reflectivity of the subject has any role to play in the exposure settings. Actually speaking – the reflectivity of the subject is important in one sense that we need to capture the true nature of light incident on the subject when we are shooting.

But the key is we do not want to negate this effect; we want the reflectivity of the subject to directly influence the exposure in order for the subject to look realistic in the photo. The problem is that the camera's automatic exposure system does negate this effect with its assumption that all subjects are of medium reflectivity, resulting in incorrect exposures for all but medium brightness subjects.

To summarize so far, of the four factors affecting exposure, the photographer only has control over the shutter speed and aperture (factor 3), and ISO (factor 4).

Assuming a given film speed, the photographer must choose a shutter speed and aperture based on the amount of light incident on the subject (factor 1) and the reflectivity of the subject (factor 2).

But as seen above, because we want to realistically portray the brightness or darkness of the subject, the reflectivity of the subject should not really affect the choice of shutter speed and aperture.

Thus, the amount of light incident on the subject remains as the primary factor controlling exposure. Therefore - For correct exposure, we must assess this factor and select an appropriate shutter speed and aperture for the photograph.

we shall continue on our understanding of metering and metering systems in the next blog .. Following up on the temples of Cambodia - Here's our stunning pick of the week by Jeff sullivan

Horsetail Falls in Yosemite Valley is selectively backlit by the setting sun. This was an amazing spectacle to witness. Happening only two weeks out of the year, the setting sun falls behind the vertical face of El Capitan, selectively lighting this waterfall with its orange sunset light. Gradually growing in intensity and color for the last 5 minutes or so, it was like seeing a narrow strip of lava flowing down the face of El Capitan. The weather and the water flows often don't cooperate, I was shut out by a blizzard last year, so I was fortunate to see this on two consecutive evenings this year - Jeff Sullivan

Hari Kumar Balasundaram


Before and After - Advertisement - Brightness and Contrast

Published by தம்பி... under , , on 2:10 AM
Place: Fruit Shop in Greams Road
Before:
BeforeKiwi


After:
Friendship

Steps:
1. Slightly tilt the image
2. Crop the photo as per the desired size
3. Increase the Brightness and Contrast
4. Add Border to the Canvas

The Almanac - Page 1 - Basics of Exposure

Published by Hari Kumar Balasundaram under , , , , on 5:03 PM

The word photography comes from two ancient Greek words: photo, for "light," and graph, for "drawing." "Drawing with light" is a way of describing photography.

When a photograph is made, light or some other form of radiant energy, such as X rays, is used to record a picture of an object or scene on a light-sensitive surface.

In other words, Photography is simply capturing Light through exposure. To expose simply means to subject the film/ digital sensor in your camera to light. How we expose shall ultimately determine the final output - Talking of which, there are three most important parameters that define the outcome.

The aperture, shutter speed and ISO

An analogy for the concept is to think of taking photographs as filling a bucket of water. Imagine the following:

Water = Light;

Lens = hosepipe;

ISO = Bucket / bucket size;

Aperture = Diameter of the hosepipe

Shutter = Tap

Imagine that you are in control of a tap that provides water to this bucket. In doing so, you are in control of two things: how fast the water comes out and how long it takes before you shut the tap. Too little light results in an underexposed image, just as too little water results in an under-filled bucket. Too much water results in over filling, just as too much light results in overexposure.

Your end goal is being able to fill the bucket just to the top without spilling over (overexposing). There are infinitely many ways of doing this, but you must attain this specific value. For example, you can do this by letting the water come out very fast for a short time, or you can let the water drip slowly over a very long time.

The amount of time you let water [light] “pour in” the camera is called “shutter speed” and it can vary anywhere from seconds to minutes to hours sometimes

The amount of flow has its equivalent in “aperture size”[diameter of the hose pipe], which basically measures how big the opening that lets the light shine on sensor or film is.

These two values – shutter speed and aperture are intertwined. To get the correct exposure, both have to be set correctly – that is, if you increase the exposure time then you need to decrease the aperture.

Going back to the world of photography, In terms of exposure, it doesn't matter whether you use a larger or smaller diameter hosepipe [aperture] as long as the length of time the tap [shutter] kept open is long enough for the required volume of light to reach the sensor[exact amount of water to fill the bucket].

ISO = constant; Higher the aperture value = lower the shutter speed

ISO = constant; Lower the aperture value = Higher the shutter speed

There are other considerations and consequences of using different apertures and shutter speeds. It's the balancing of these factors which determine how a photograph is exposed. That's why taking a photograph is just like filling a bucket

As said above, shutter speed measures how long the actual "exposure" takes. Shutter speed works on a double/halving scale - 2 seconds 1 second 1/2 seconds 1/4 seconds 1/8 seconds 1/15 seconds etc.

Aperture on the other hand is expressed as F-values like F1.8 - F2.8 - F4 - F5.6 - F8 - F11- F16 etc...

ISO values basically denote how sensitive the image sensor / film is to the amount of light present. ISO values range from 50 to even 3200 these days - the higher the ISO, the more sensitive the image sensor.

To recap – ISO, Shutter speed and Aperture form the fulcrum of good exposure to Light – the science of which we shall continue in the next blog as well.

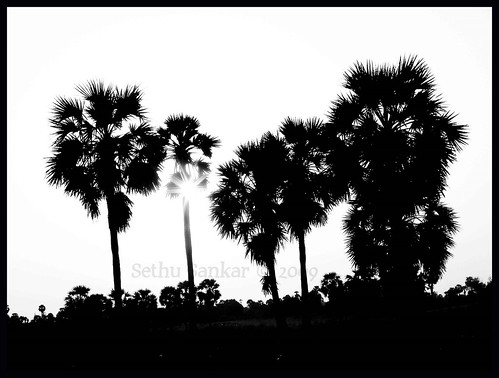
Following up on last week’s terrific click from the Rock fort in Trichy – let us know what you think of this classic:

Icon of Khmer civilization, Angkor Wat in Cambodia endures as a revered religious shrine.


Hari Kumar Balasundaram

The Almanac of a Photographer...

Published by Hari Kumar Balasundaram under , , , , , , on 3:00 AM

An unknown wise man once remarked that a photography class should be a requirement in all educational programs because it makes 'you see the world rather than just look at it'.

That photography can make you think is a given - it could make you see the world through a 'little window' called view-finder and yet you could see so much more than what a normal being could actually 'look' though his eyes.

the creative expressions are numerous; a photograph is an open statement welcoming the new, the old, the bold n the beautiful to complete the act in his/her own way of seeing things.

So what is photography after all – Is it just a measly capture of colour, light or freezing motion. What entails photography? & above all where does the soul lie in a photograph.

As Henry Cartier once said – “The photograph itself doesn't interest me. I want only to capture a minute part of reality”. Easier said than done – Don’t you think !!!

Could we make a photograph actually speak a thousand words!!!

Could we actually capture that ‘split second’ – that one moment of glory when all else in the world were just looking at it. In the words of Ansel Adams – Could we actually make a photograph and not just shoot one !!!

After all, No photographer is as good as the simplest of all cameras. So what makes us all those who own the best equipments on field – those of us who can create pictures out of nothing – those of us who can see the world in a better way than the rest of us.

This in essence is what shall cram the almanac of a photographer

  • From the day - photography was born and its evolution through the Mesolithic and stone age era to the digital fortress that we have chosen to live in now – the almanac shall try and bring to you those moments of brilliance that has been so not be seen and little understood.
  • The almanac is an intermediate for knowledge sharing be it simple definitions of photography terms in the words of a layman to the ultimate tutorials in creating HDR images; we shall help you create the best pictures through innumerable ways of post processing.
  • Photographing various elements of nature and how to get the best out of whatever you own..
  • We shall bring to you the legends of Photography from all over the world and why their work spells magic & showcases an aura of heaven & earth rolled in one; More importantly –what inspired them and how they made it to the pinnacle.
  • We shall also strive to present the various photo competitions that you could actually be part of
  • We would also try and post world renowned articles and white papers on photography that should help you enrich your knowledge further.
  • And to keep you in sync with the Technology of tomorrow – we shall try and help you be up to date with the trends and happenings in the digital world.Finally – Awesome clicks from around the world and a forum to discuss what makes it special from the rest of the clicks.

All this and much more in simple easy to learn ways to be posted on this blog from time to time.

Learning is a never ending process no doubt and as Albert Einstein once remarked – 'the difference between the learned and his alter ego is trivial when compared to the unknown'. This Blog true to Einstein’s word will look to address the tip of the iceberg of the galactica of Photography.

Go on - Be a part of this renaissance and contribute to this effort by participating in this whirl-wind effort – not only by reading it but also by egging us on – criticising us – and more importantly bring on your own ideas to the forum and help us learn and grow together !!!

To start with - Here's a very special click of Trichy - Let us know what you think !!!


This photo is taken at the top of the 83-meter-high Rock Fort—the only outcrop in the otherwise flat land of the city of Trichy in Tamil Nadu, India. I awoke for the climb at sunrise, in order to capture the colours from the sun radiating over the hazy city. Looking back down, we see one of many decorative Hindu temples in the area of the Rock Fort. -- Photograph by David Lazar

Hari Kumar Balasundaram